Cigarette Buydowns
Managing Your Cigarette Buydown Program
If your business participates in a cigarette buydown program, you may want to set it up as follows. This method will allow you to collect taxes appropriately and get accurate sales reports.
Note: If you are subscribed to either or both of the Tobacco Scan Data Addon Module(s), you should not use this method to track Buydowns. Instead you should reduce the retail price of the Philip Morris item by the buydown discount amount OR use the Price Formula utility. The Scan Data addon module is not compatible with linked PLUs and the Philip Morris Loyalty Fund Program. RJ Reynolds requires that Buydowns are reported to Scan Data, so a Price Formula must be used. For more details, see Tobacco Scan Data Addon Modules.
Step 1:
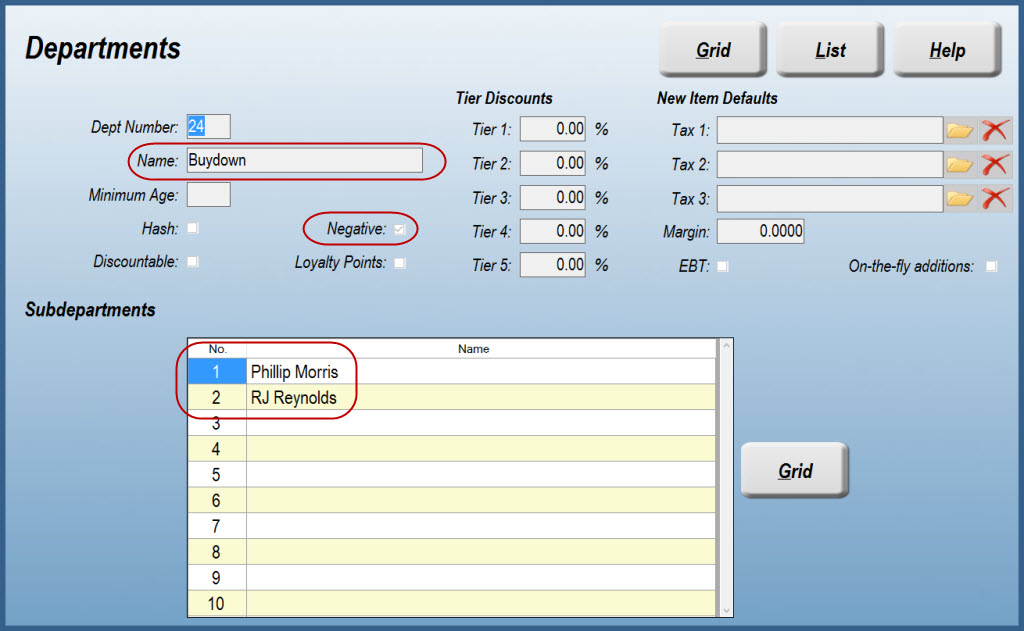
Create a Department called "Buydown", and make it a negative Department. If you want to separate the buydown programs by manufacturer, you can add Subdepartments with the manufacturer name on this screen. Save and exit
Step 2:
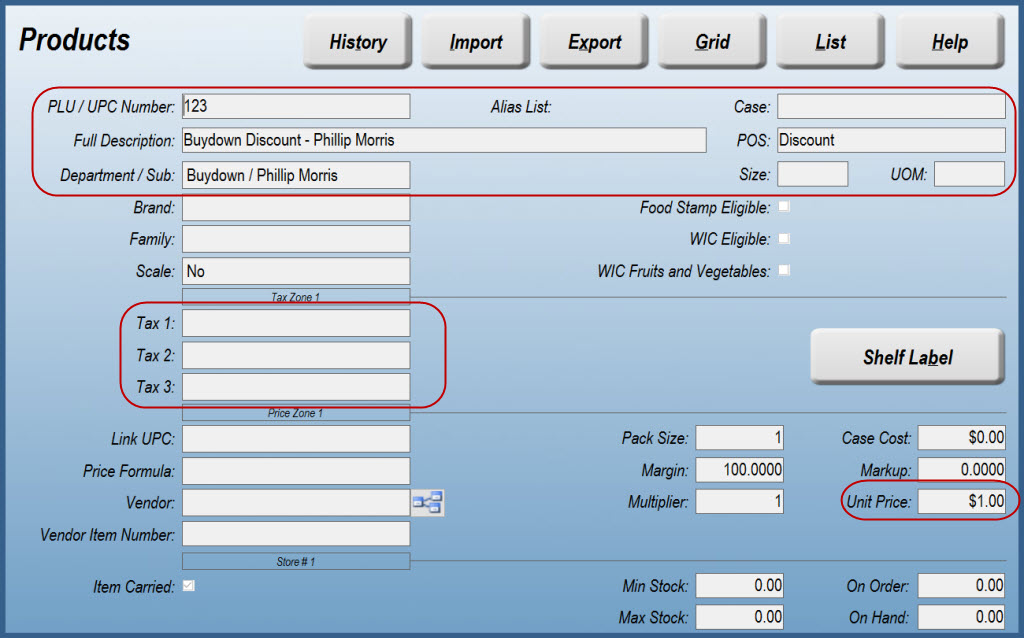
Now, create a new Product. For the PLU number, enter a number of your choosing. For the description, call it "Buydown Discount - Phillip Morris" and for the POS description, enter "Discount". You can change the cigarette manufacturer name as you see fit.
Assign the Product to the Buydown Department you created in Step 1. If you're keeping track of multiple Buydowns, assign each one to the appropriate Subdepartment.
Price the Buydown Product to equal the amount of discount you wish to give the customer. Use a positive number. The fact that it is a negative department will ring this in as a negative number, or discount.
If your tax jurisdiction requires that customers pay the full sales tax of the cigarettes before the discount, leave the Tax fields empty. If your jurisdiction allows for the discount to reduce taxes, enter the appropriate tax in the Tax field(s).
When you've finished, Save the new Product. Here's an example of a Buydown Discount in a jurisdiction that requires the customers to pay the full tax:
Step 3:
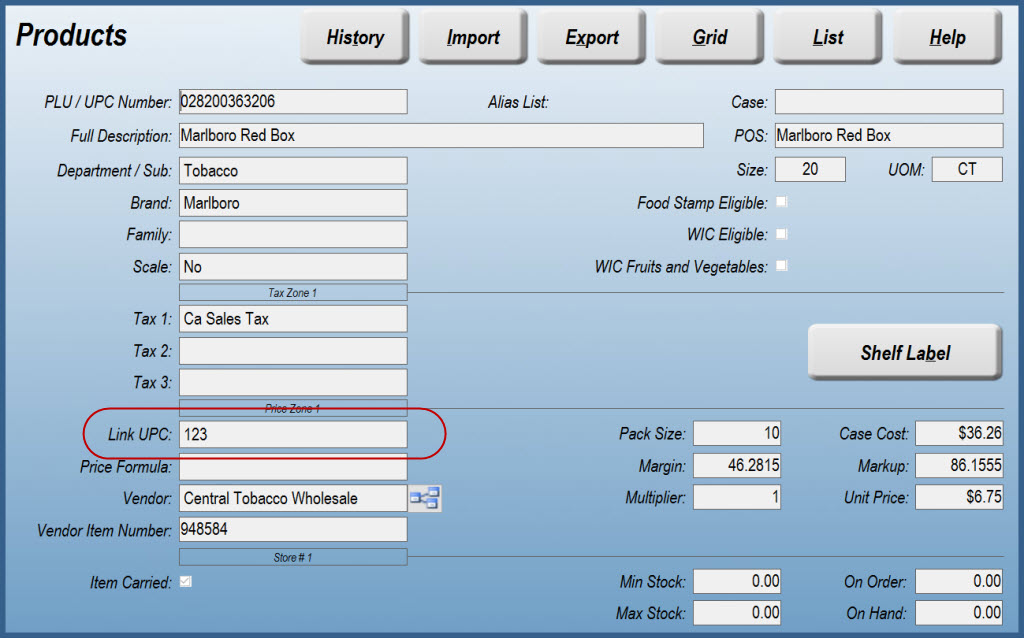
While still in Products, find one of the cigarettes that will be eligible for the Buydown discount. Edit the record and enter the Buydown discount Product you created in Step 2 in the Link UPC field.
Save and exit to the menu. Press SYNC and enter the POS.
Step 4:
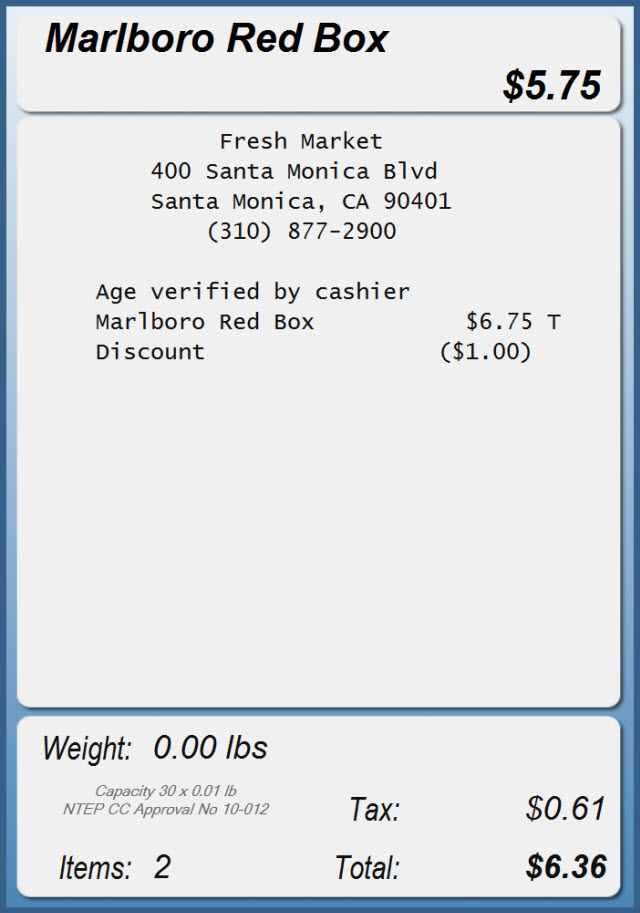
Let's take a look at how to sell the cigarette with the discount link in it. Scan or enter the PLU for the pack of cigarettes you edited in Step 3.
You’ll see that the discount (non-taxable) is now applied to the sale.
Reporting
One of the great benefits of this method is that you will be able to run an Inventory Sales Report by Department (or Subdepartment ) to see how many of these discounts were given out, ensuring that you receive the proper payback from your vendor.
To run the report, navigate to Reports > Inventory > Sales.


