Receipt Printer
StoreTender supports receipt printers from a wide variety of manufacturers. This guide will help you set up your receipt printer.
First, install your printer on your Windows PC using the installation program that came with your device. If you no longer have access to the installation program, most manufacturers have them available on their website.
OPOS drivers are not necessary for operation with StoreTender, and can cause conflicts. Do not install the printer OPOS drivers, or uninstall them if they are already on your system.
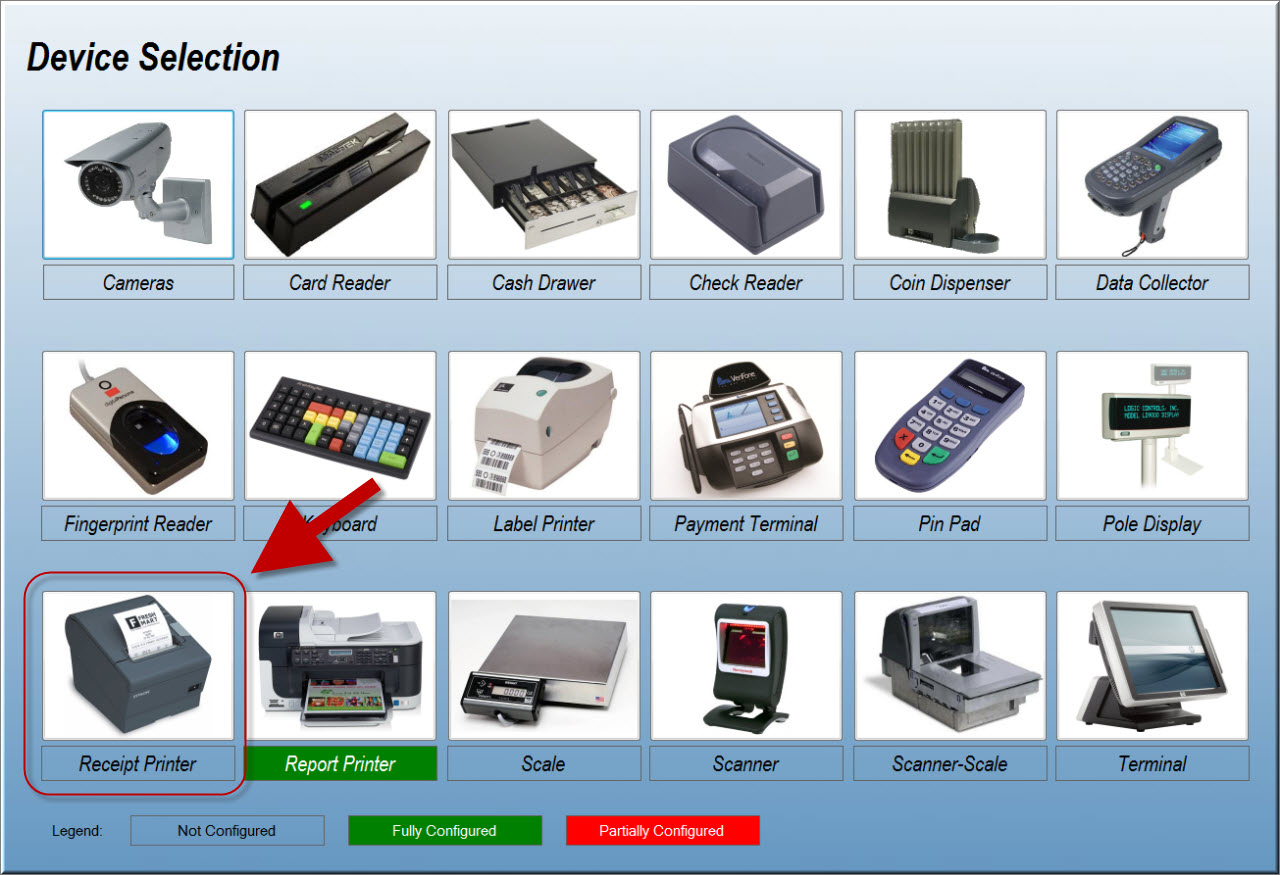
To access the device configuration screen, from the Main Menu navigate to
Setup > Register > Devicesand selectReceipt Printer.
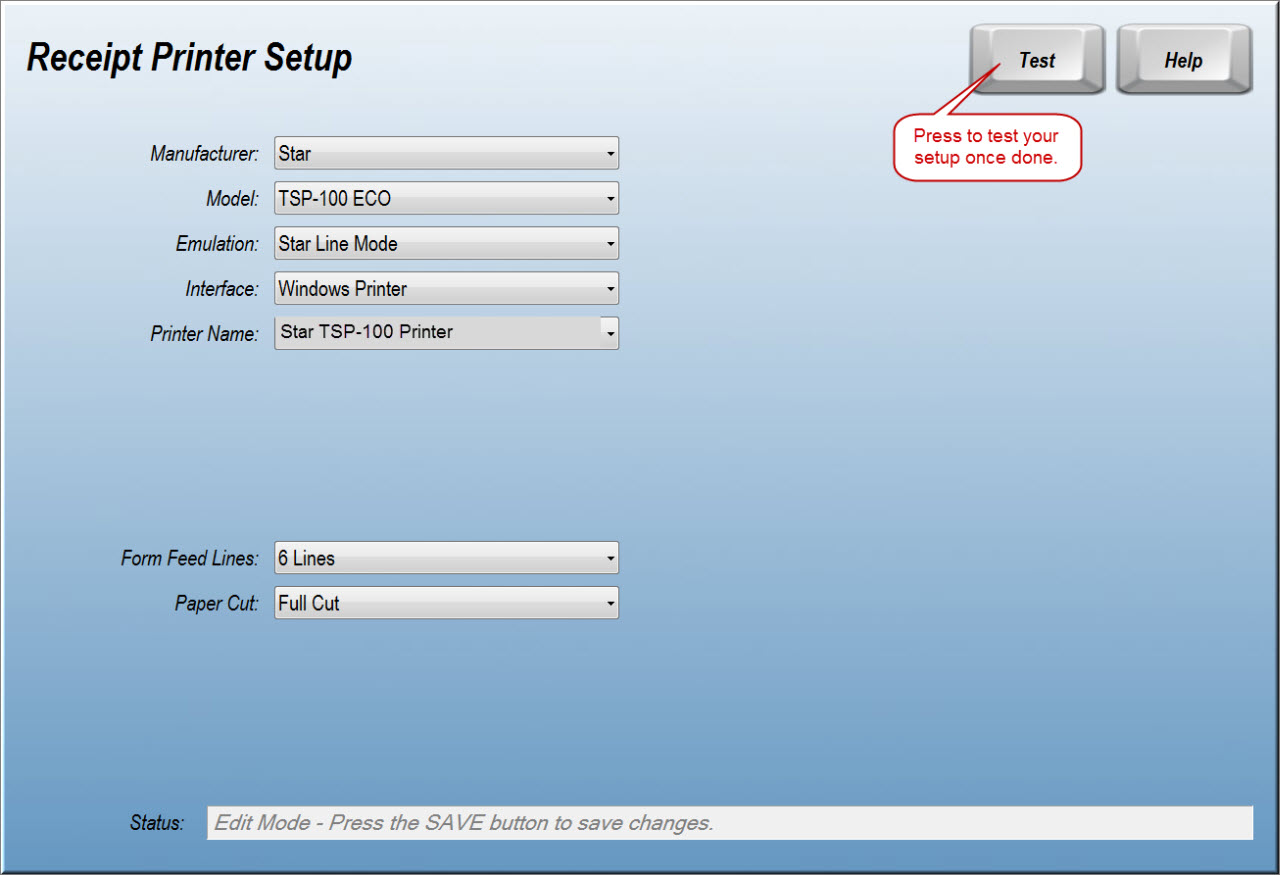
On the Receipt Printer Setup screen, enter the information appropriate for the printer and connection type that you are using. In this example, we are using a Star printer which was installed as a Windows printer. Add the number of blank lines to insert after the print job is completed and whether or not you want to enable the paper cut functionality, if present.
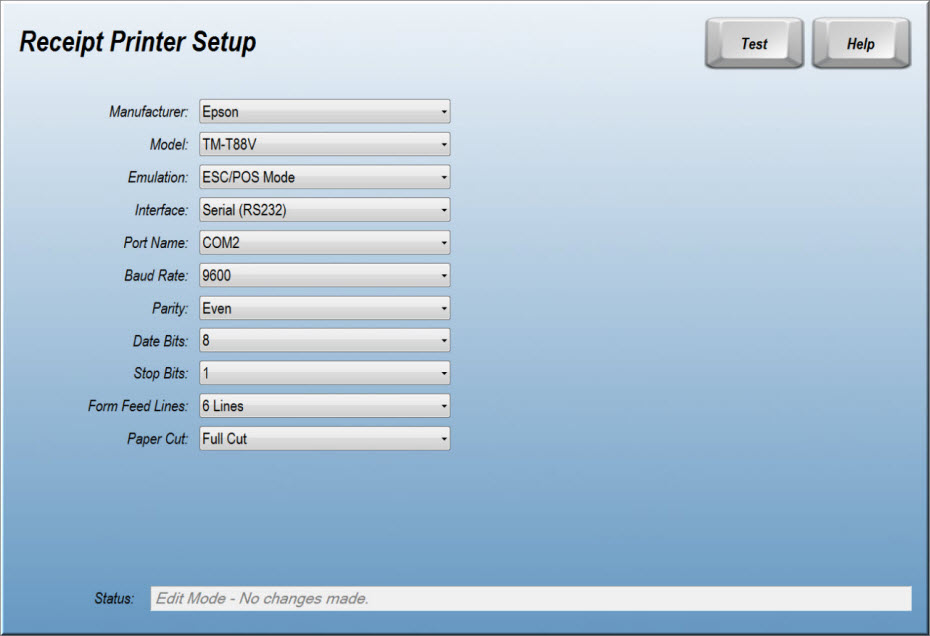
If you printer has a direct COM (serial) port connection, you can avoid setting up the Windows printer driver. Settings for the device are sometimes controlled by DIP switches found on the printer. Check your manufacturer's documentation for the default settings and enter them in the Device Setup screen. In the below example we are connecting an Epson receipt printer.
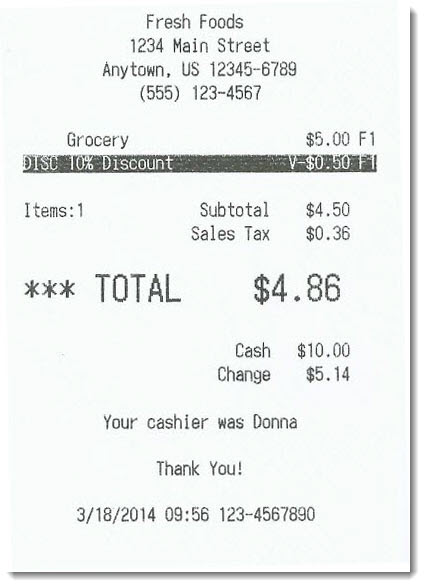
Once you've completed your setup, press the
Testbutton to generate a sample receipt. Enhanced printing functions like enlarged and inverted text can be seen on the sample below.
It is always a good idea to REBOOT your system whenever you've installed new hardware or drivers. Often, features such as paper cut do not function until your computer has restarted.
Note: Some users of the EPSON TM-T88IV and TM-T88V receipt printers have reported that the Paper Cut feature does not work when installed. Please be sure you have selected the "ESC/POS Mode TM88 IV/V" emulation when setting up these models.
If you do not see a bold total or inverse print, make sure your emulation setting is correct. Often printers with incorrect emulation settings do not display special text correctly.
Check Endorsement Feature
StoreTender also supports printing of up to three lines of endorsement text when a check is tendered. One check per transaction can be endorsed.
Requirements:
A receipt pringer capable of slip printing using either of the following Emulations:Note: Works with serial and Windows receipt printers.
- ESC/POS Mode w/Slip
- Star Line Mode w/Slip
Setup
To activate, navigate to Setup > Register > Devices > Receipt Printer.
When either of the above Emulations are selected, the following options appear:
- Endorsement Line 1
- Endorsement Line 2
- Endorsement Line 3
Fill in one or more endorsement wines with text. You can also use the following replacable parameters:
- <Date> Prints the current date
- <Time> Prints the current time
- <Register> Prints the register number
- <Cashier> Prints the cashier number
- <Transaction> Prints the transaction number
- <Amount> Prints the amount of the check tendered
Note: Parameters are not case sensitive.
Usage
When a check is presented for payment the cashier will be prompted to insert the check, face down in the printer slip area. For multi-tendering the order the check is presented is irrelevant.
To endorse, insert the check as above and press [OK]. The receipt will print, the check endorsed and ejected from the top of the paper path.
Can't find your printer in our list of supported devices? Try setting it up using the [Generic] setting. If you'd like a printer added to our list of supported devices, feel free to open a support ticket and we'll see what we can do.


